Getting Started With Shopflow
A walkthrough of setting up your Shopflow account. This article covers customizing shop-specific tasks, importing customers, customizing preferences, and connecting to Shopflow POS.
Configuring an entirely new software can be an intimidating task. We're here to make that undertaking a bit easier. We'll walk you through customizing Shopflow to best fit your shop's needs.
Setting Up Jobs and Packages
Adding tasks
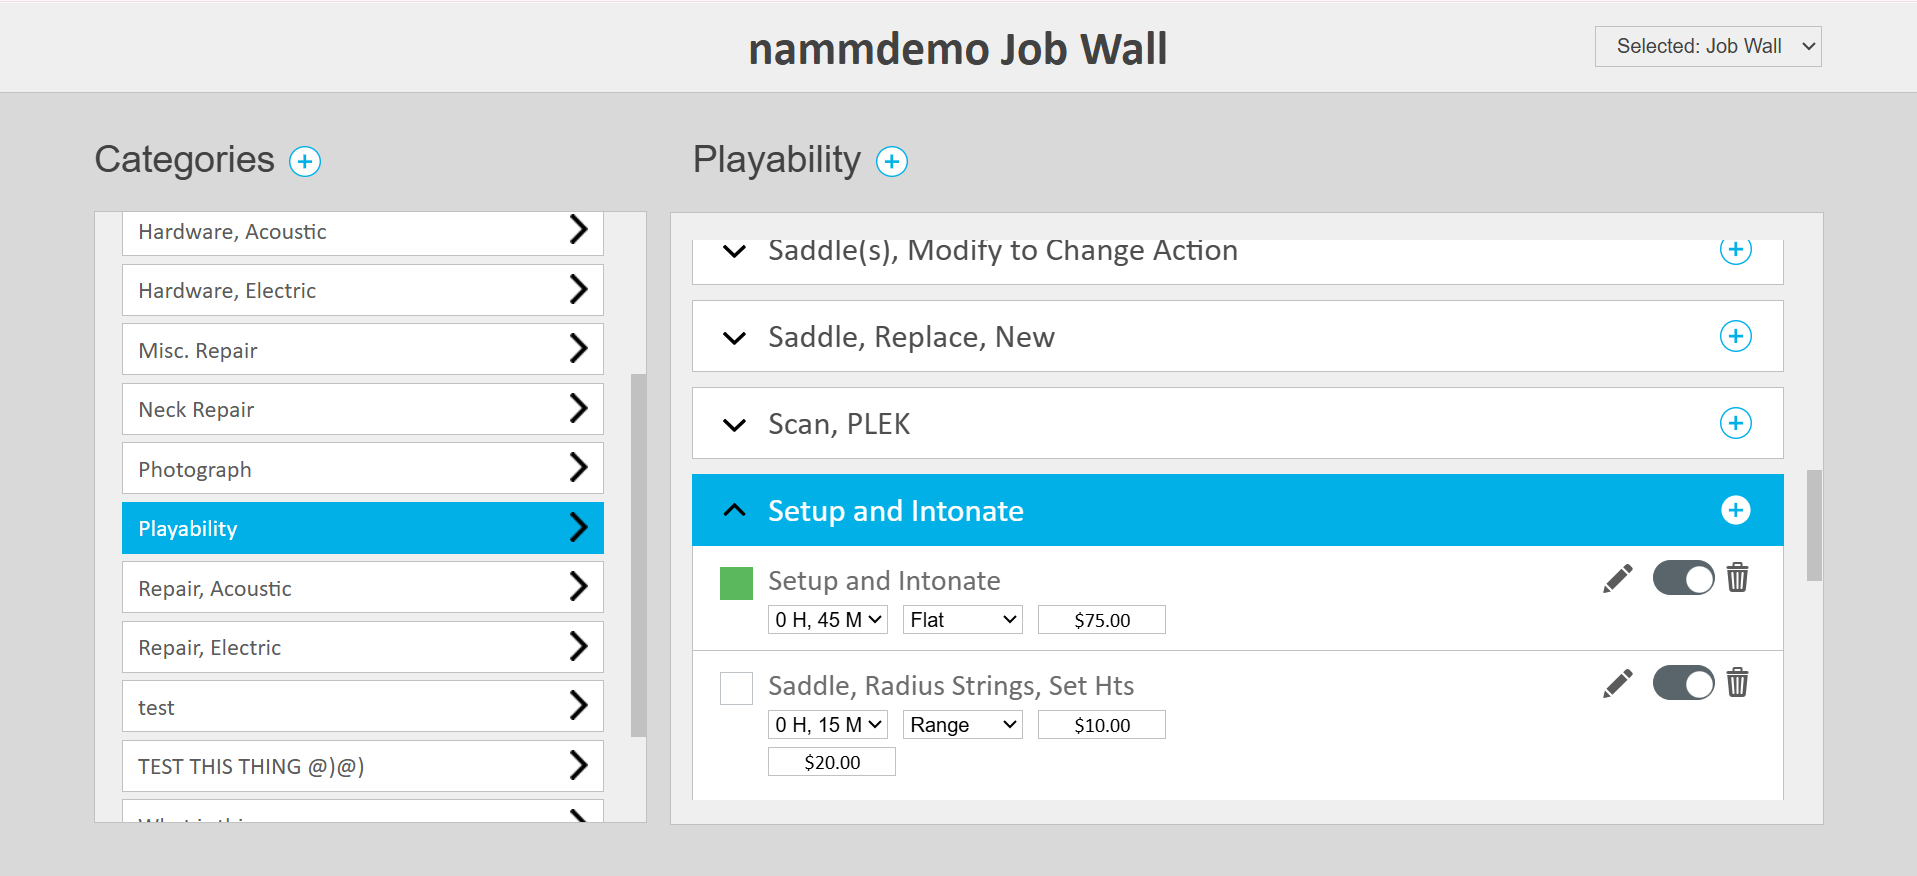
The job wall is where tasks such as refrets, inspections, setups, and crack repairs are found. To customize available shop tasks, click ‘Admin’>’Tasks, Parts, and Packages.’ You’ll first be shown the ‘Job Wall.’ Here, you’ll see prepopulated categories with their respective job types.
- Add desired categories by clicking the ‘plus’ button next to the header.
- Make categories inactive by hovering over the category and toggling the category off. Rename the category by tapping the pencil button. The same functions are available at every sublevel of job type. Find ‘Inactive’ categories by scrolling to the bottom of the category list and inactive jobs at the bottom of their subcategories.
- Customize estimated job times and costs. Click into a desired job and edit the average time your shop takes to complete them once they’ve begun by tapping the first drop down box and selecting the appropriate time. Click the middle box to toggle between cost rate types. If you’d like to give estimates in ranges, select ‘Range’ or if your shop prefers flat rates, select ‘Flat.’ Input the cost your shop charges in the third box.
- Use the box in the left hand corner of the task view to highlight tasks
Note: Shopflow is preloaded with common tasks. These tasks are fully customizable and can be deleted depending on your shop's needs.
Adding Packages
"Packages" function as presets grouping tasks and/or parts that are often performed together (for example, a refret requires the tasks "Install frets," "Fret dress," "Fingerboard, plane." Rather than individually selecting each task, the "Refret" package groups these tasks under one umbrella). Find the drop down list in the top right hand corner. Tap and select ‘Package Wall.’
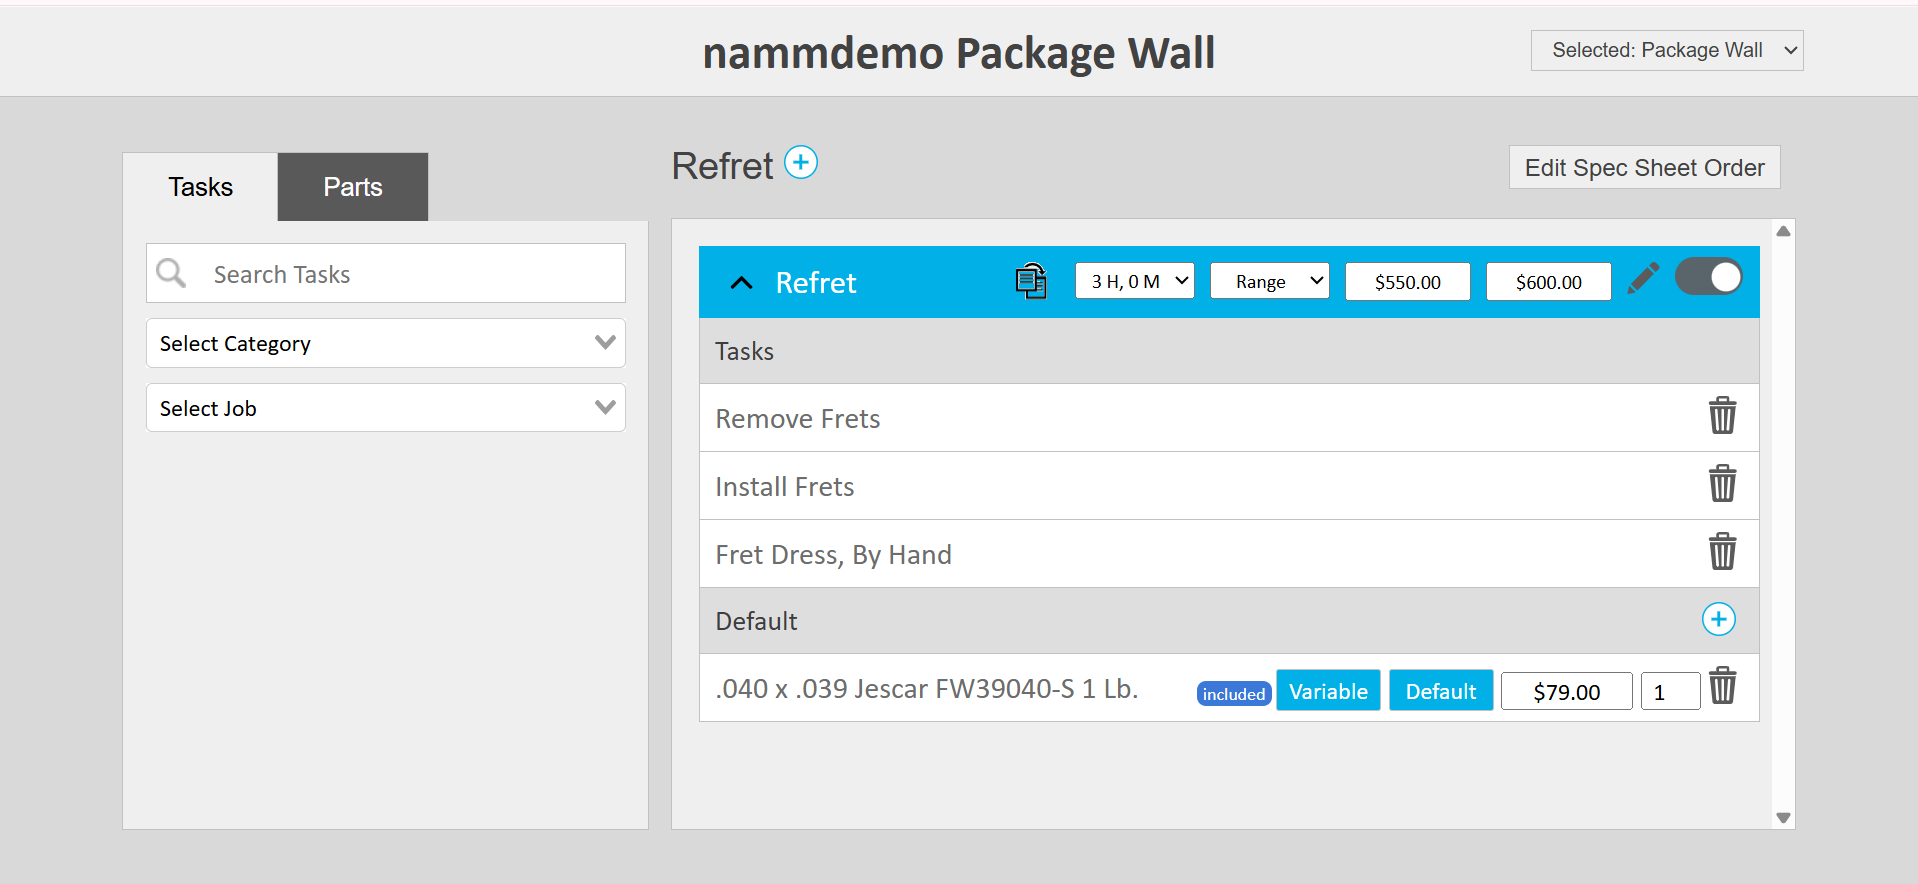
- Click the plus button next to Categories to add a new package. Name it and add a desired price. Click save to add it to the Packages Wall.
- Find the package in the left panel. Click it to add tasks and parts. Search for desired tasks and click them to add to the package. Do the same for parts.
Note: Shopflow is preloaded with common packages. These packages are fully customizable depending on your shop's needs.
Inputting Inventory
To access the "Inventory" table, navigate back to the main menu and click "Admin">"Inventory." This table is where your entire shop's inventory is held.

To import an existing inventory list, send a CSV file to shopflow@gitsuite.org. If your shop does not have an existing method for inventory, manually input items following these steps:
Input necessary categories and subcategories
Most categories needed are preloaded in this area. To add Categories or Subcategories, toggle to the "Categories & Subcategories" section located under Inventory Management. Click the blue "+ New Category", input a name, and click the grey "Create button."

Input existing vendors
Toggle to the vendor section and tap "New Vendor." Enter Vendor name, phone and adress. Click "create" below address information to confirm vendor location, and click the blue "create vendor" button in the bottom right hand corner. Repeat as necessary for vendors your shop buys from.

Input brands
Toggle to the brands section, tap "New Brand" and type brand name. Click "Create Brand" once finished. Repeat as necessary for brands your shop uses.
Input Inventory Items
Toggle back to "All items" tab and click the blue "New Item" button on the right-hand side. A pop-up will appear displaying fields for Part details, Pricing and Stock Details. Enter details into their respective fields and click enter when
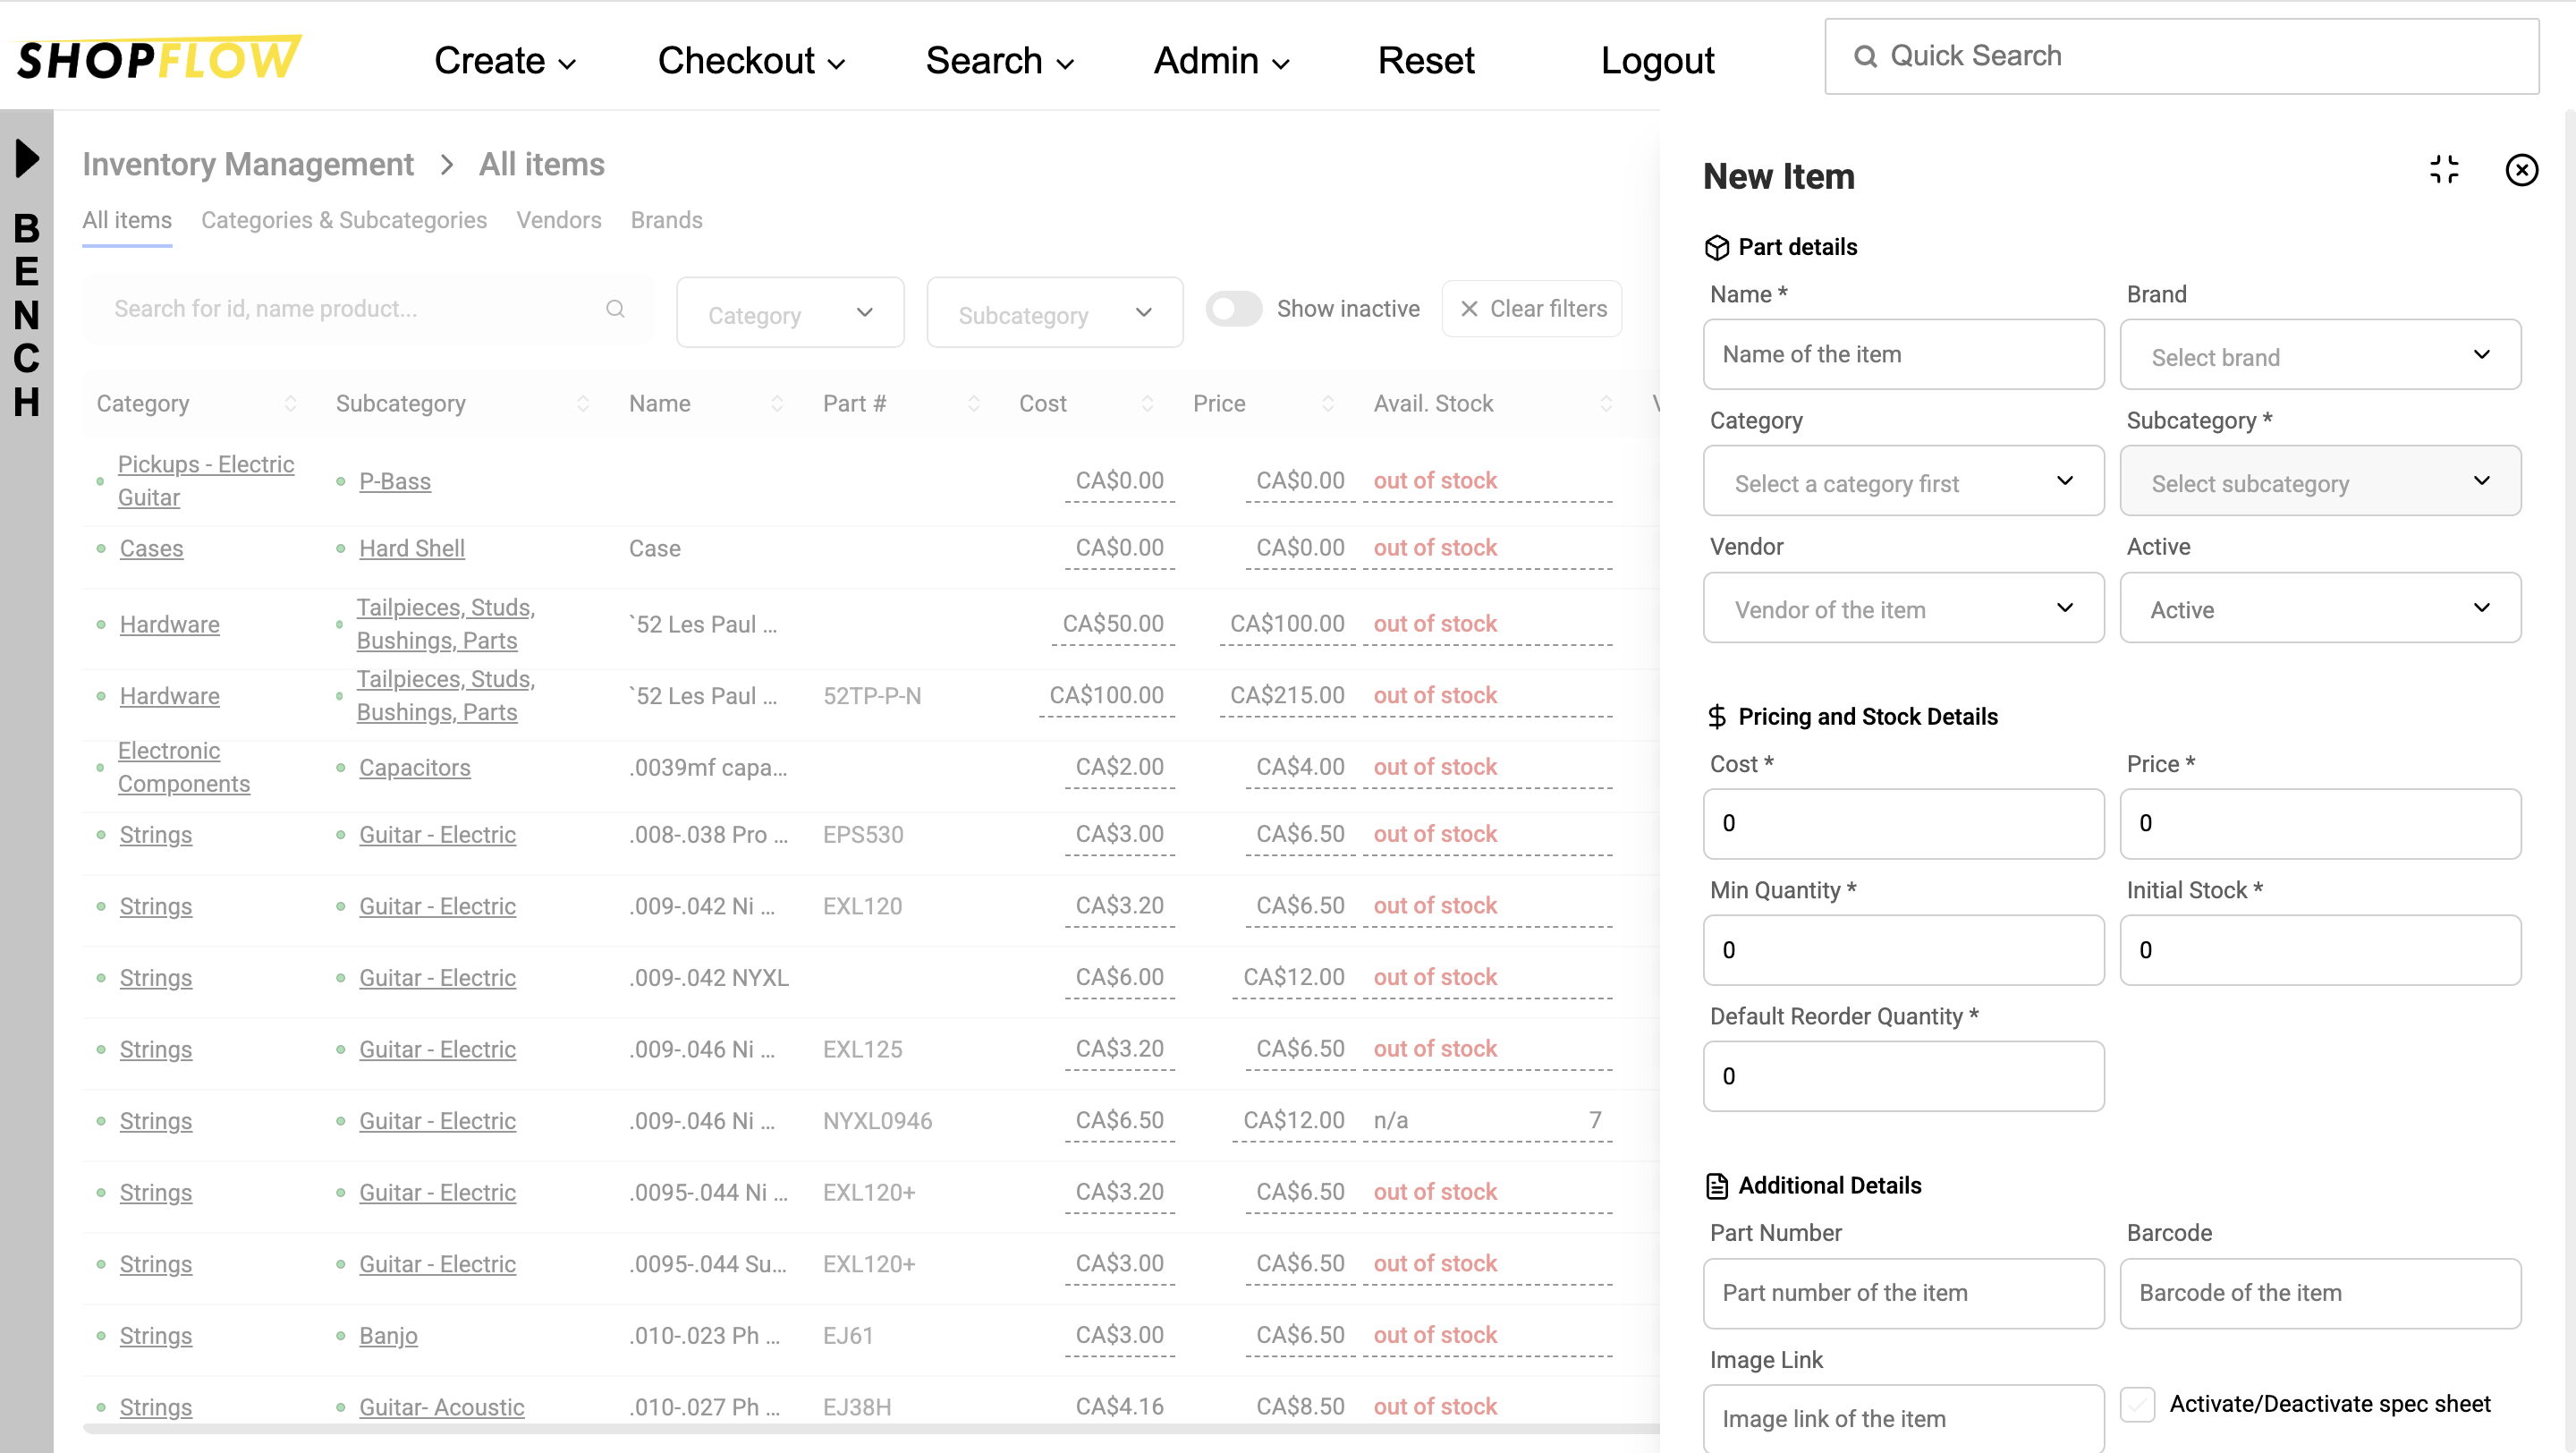
Note: It is recommended that you create an Inventory list and contact shopflow@gitsuite.org. The "New Item" function is not designed for populating your entire shop's inventory list.
Configure your administrative settings
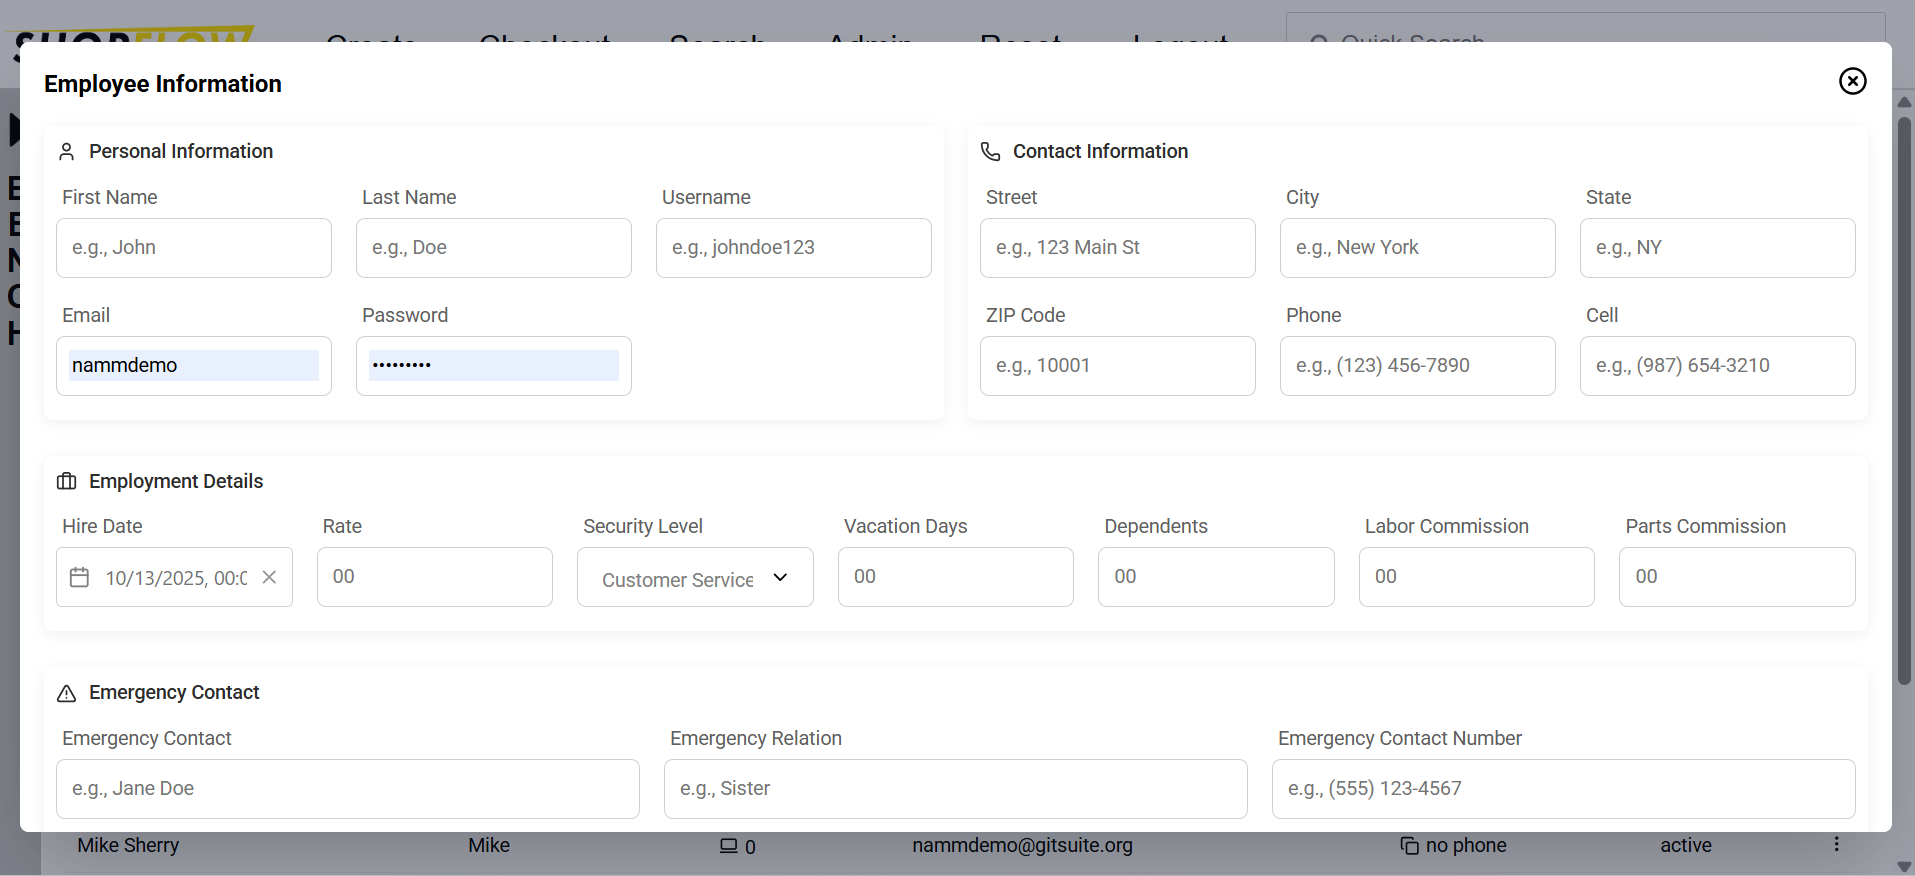
Add Employees
- Click 'Admin'>'Employees'
- Click 'New Hire' and fill in the given employee fields. Select the employees security level to give them permissions to access customizable views.
- Group employees by tapping 'New Group' and adding desired employees to a team.
Input Company Preferences
- Click 'Admin'>'Company'
- Input your company details. You'll input your hourly bench rate in this space. Later, you'll see how this rate can be used in tandem with the timer function in the software to calculate the cost of a task given bench time.
- Customize your email notifications from the 'Notifications' tab and shop terms from 'Terms of Service'
- Configure 'System Settings' such as default shipping preferences, work order settings, limit what your techs can see at their bench, and more.
- Set up your ‘Rush Charges.’ Customize additional fees for expedited jobs.
- Customize your end-of-job checklist in ‘Final Checklist.’ Once all jobs are complete for a given instrument, the tech will be prompted to complete this.
- Setup ‘Integrations.’ Link desired third-party integrations and setup Shopflow POS from here. For more on setting up Shopflow POS, click here.

Your Shopflow is now up and running. Learn how to check a customer in by creating your first work order here.