
How to Configure the Gearcheck Integration
Connect Shopflow to Gearcheck to create enriched instrument profiles that are shareable with customers.
Configuring Gearcheck
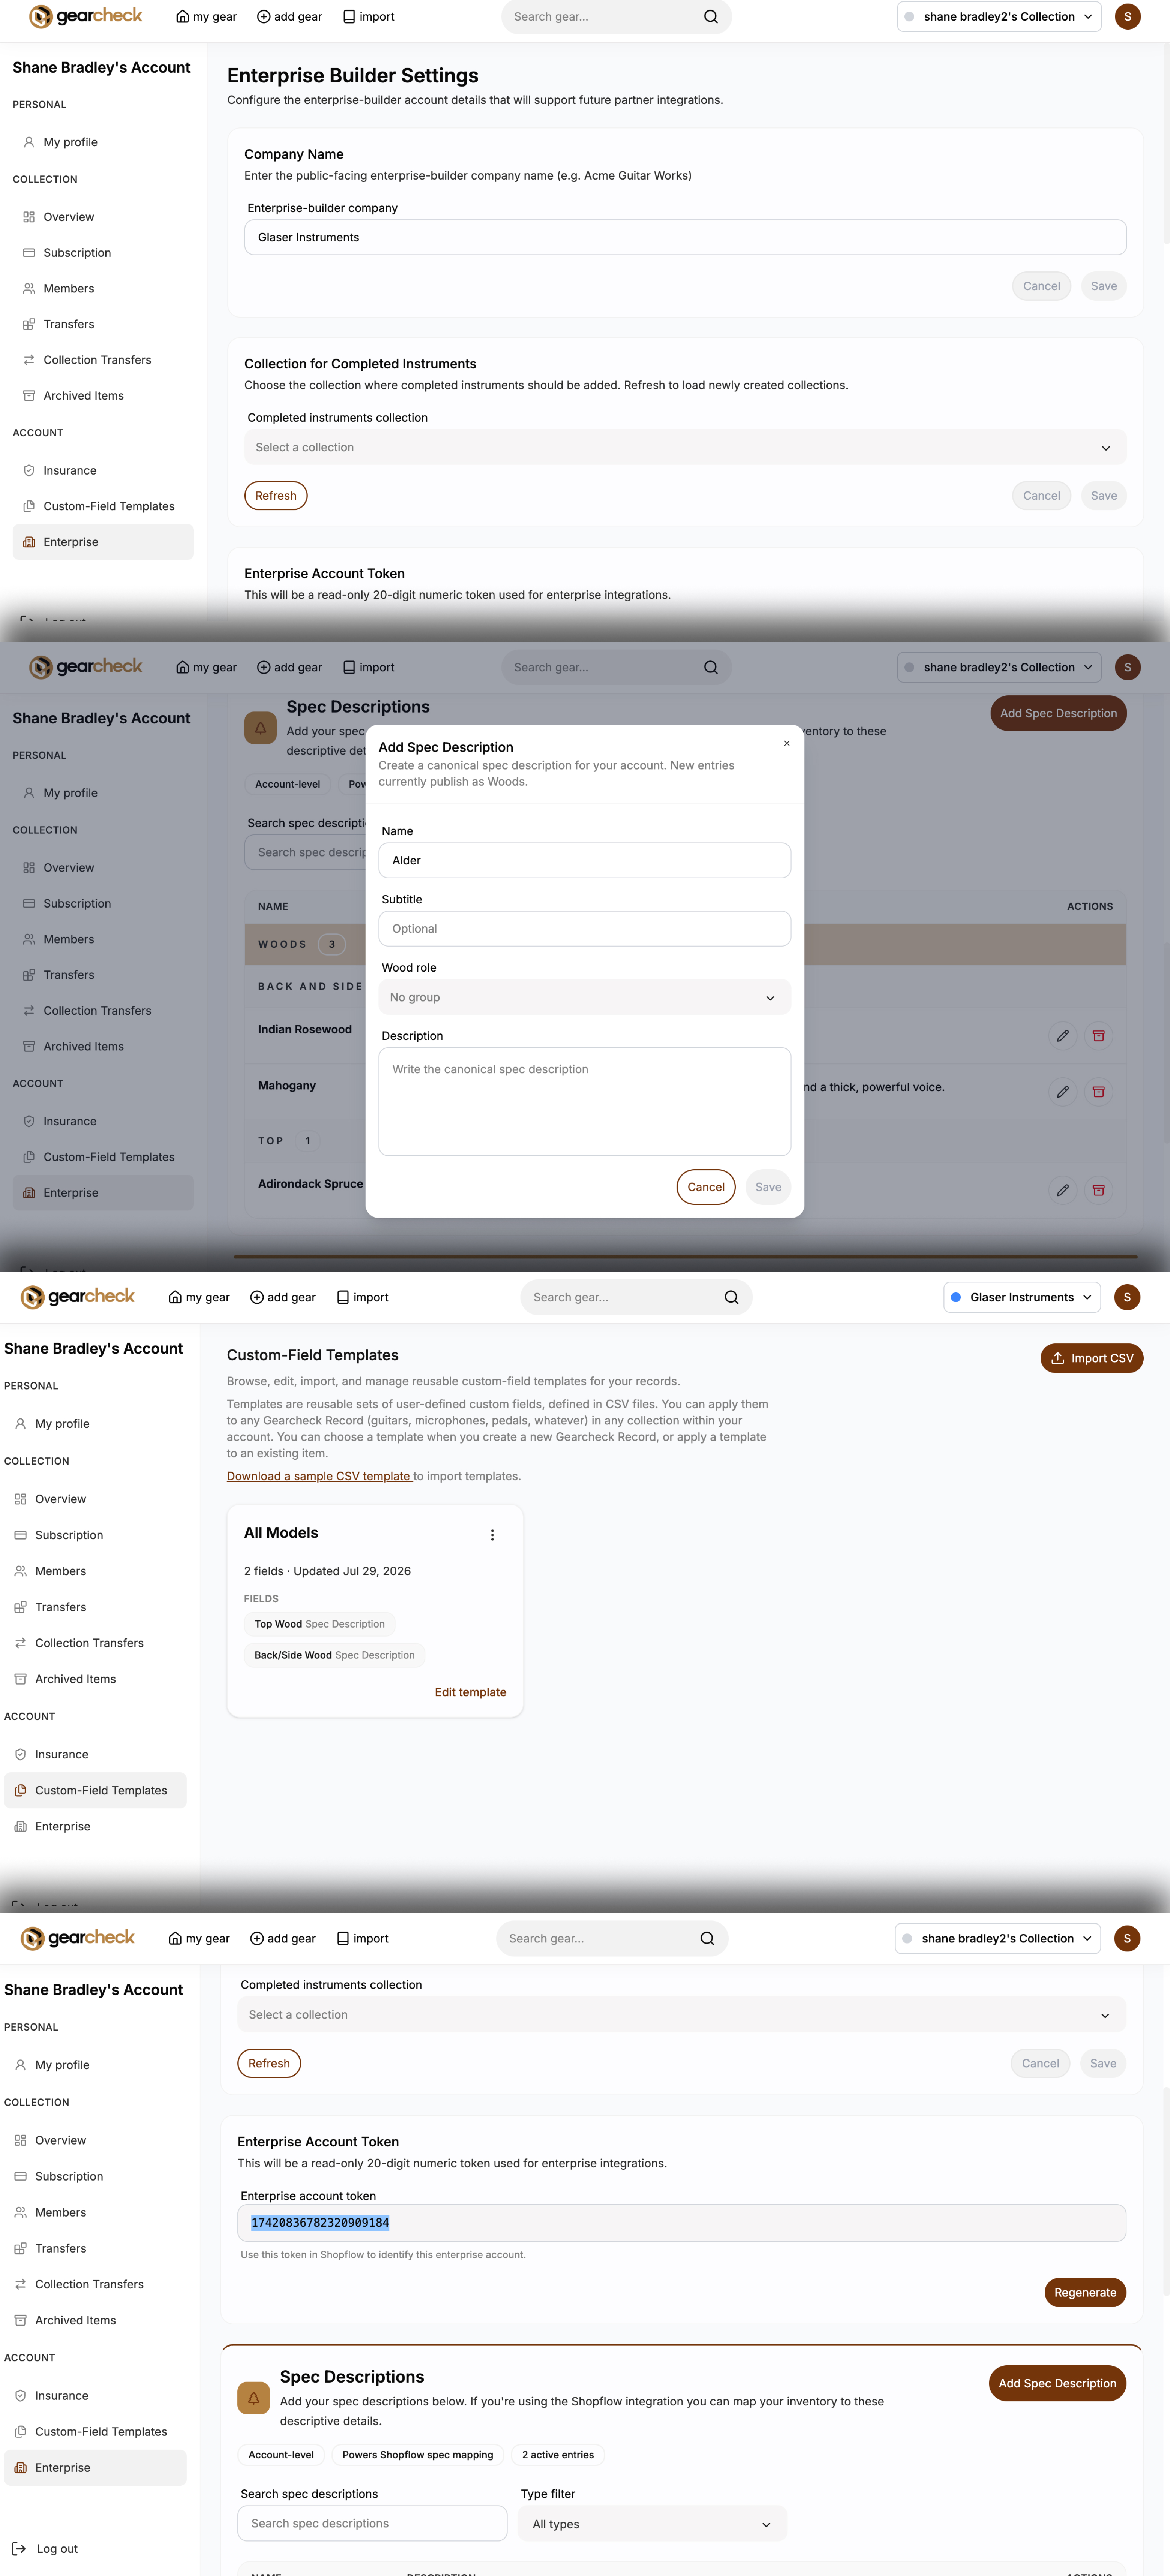
Mapping Shopflow builds to Gearcheck requires Enterprise Status to be enabled. Contact your Shopflow Representative to become an Enterprise User.
1. Navigate to 'My Account' by clicking profile icon in top right hand corner.
2. Find 'Enterprise' section.
3. Name your company. Click Save.
4. Scroll down to 'Collection for Completed Instruments' and select desired collection destination from the drop down. Click Save.
Adding Spec Descriptions
1. Scroll to find the 'Spec Descriptions' Section.
2. Tap 'Add Spec Description'
3. Populate the Name, optional Subtitle, Wood Role, and Description fields for a desired wood type. Click save.
4. Repeat step 3 for all desired wood types.
These named items will appear again in Shopflow Inventory where you will match 'Spec Description' Items to Inventory Items.
Model Template Mapping
1. Download this CSV to map wood types from Shopflow to Gearcheck.
2. Navigate to 'Custom Field Templates' section in the left panel.
3. Click 'Import CSV' in top right hand corner.
4. Click 'choose file' and select CSV downloaded in step 1. Click 'Import'
5. Navigate back to 'Enterprise' tab and scroll to 'Model Template Mapping' at the bottom of the page.
6. Under 'Resolution Mode', select 'Use one template for every model.'
7. Click the dropdown menu labeled 'Default template' and select the template called 'All models.'
Enterprise Account Token
1. Navigate to 'Enterprise Account Token' section.
2. Click 'Generate' under the token field
4. Copy the token to clipboard by double-clicking and using CTRL OR CMD+C
Configuring Shopflow
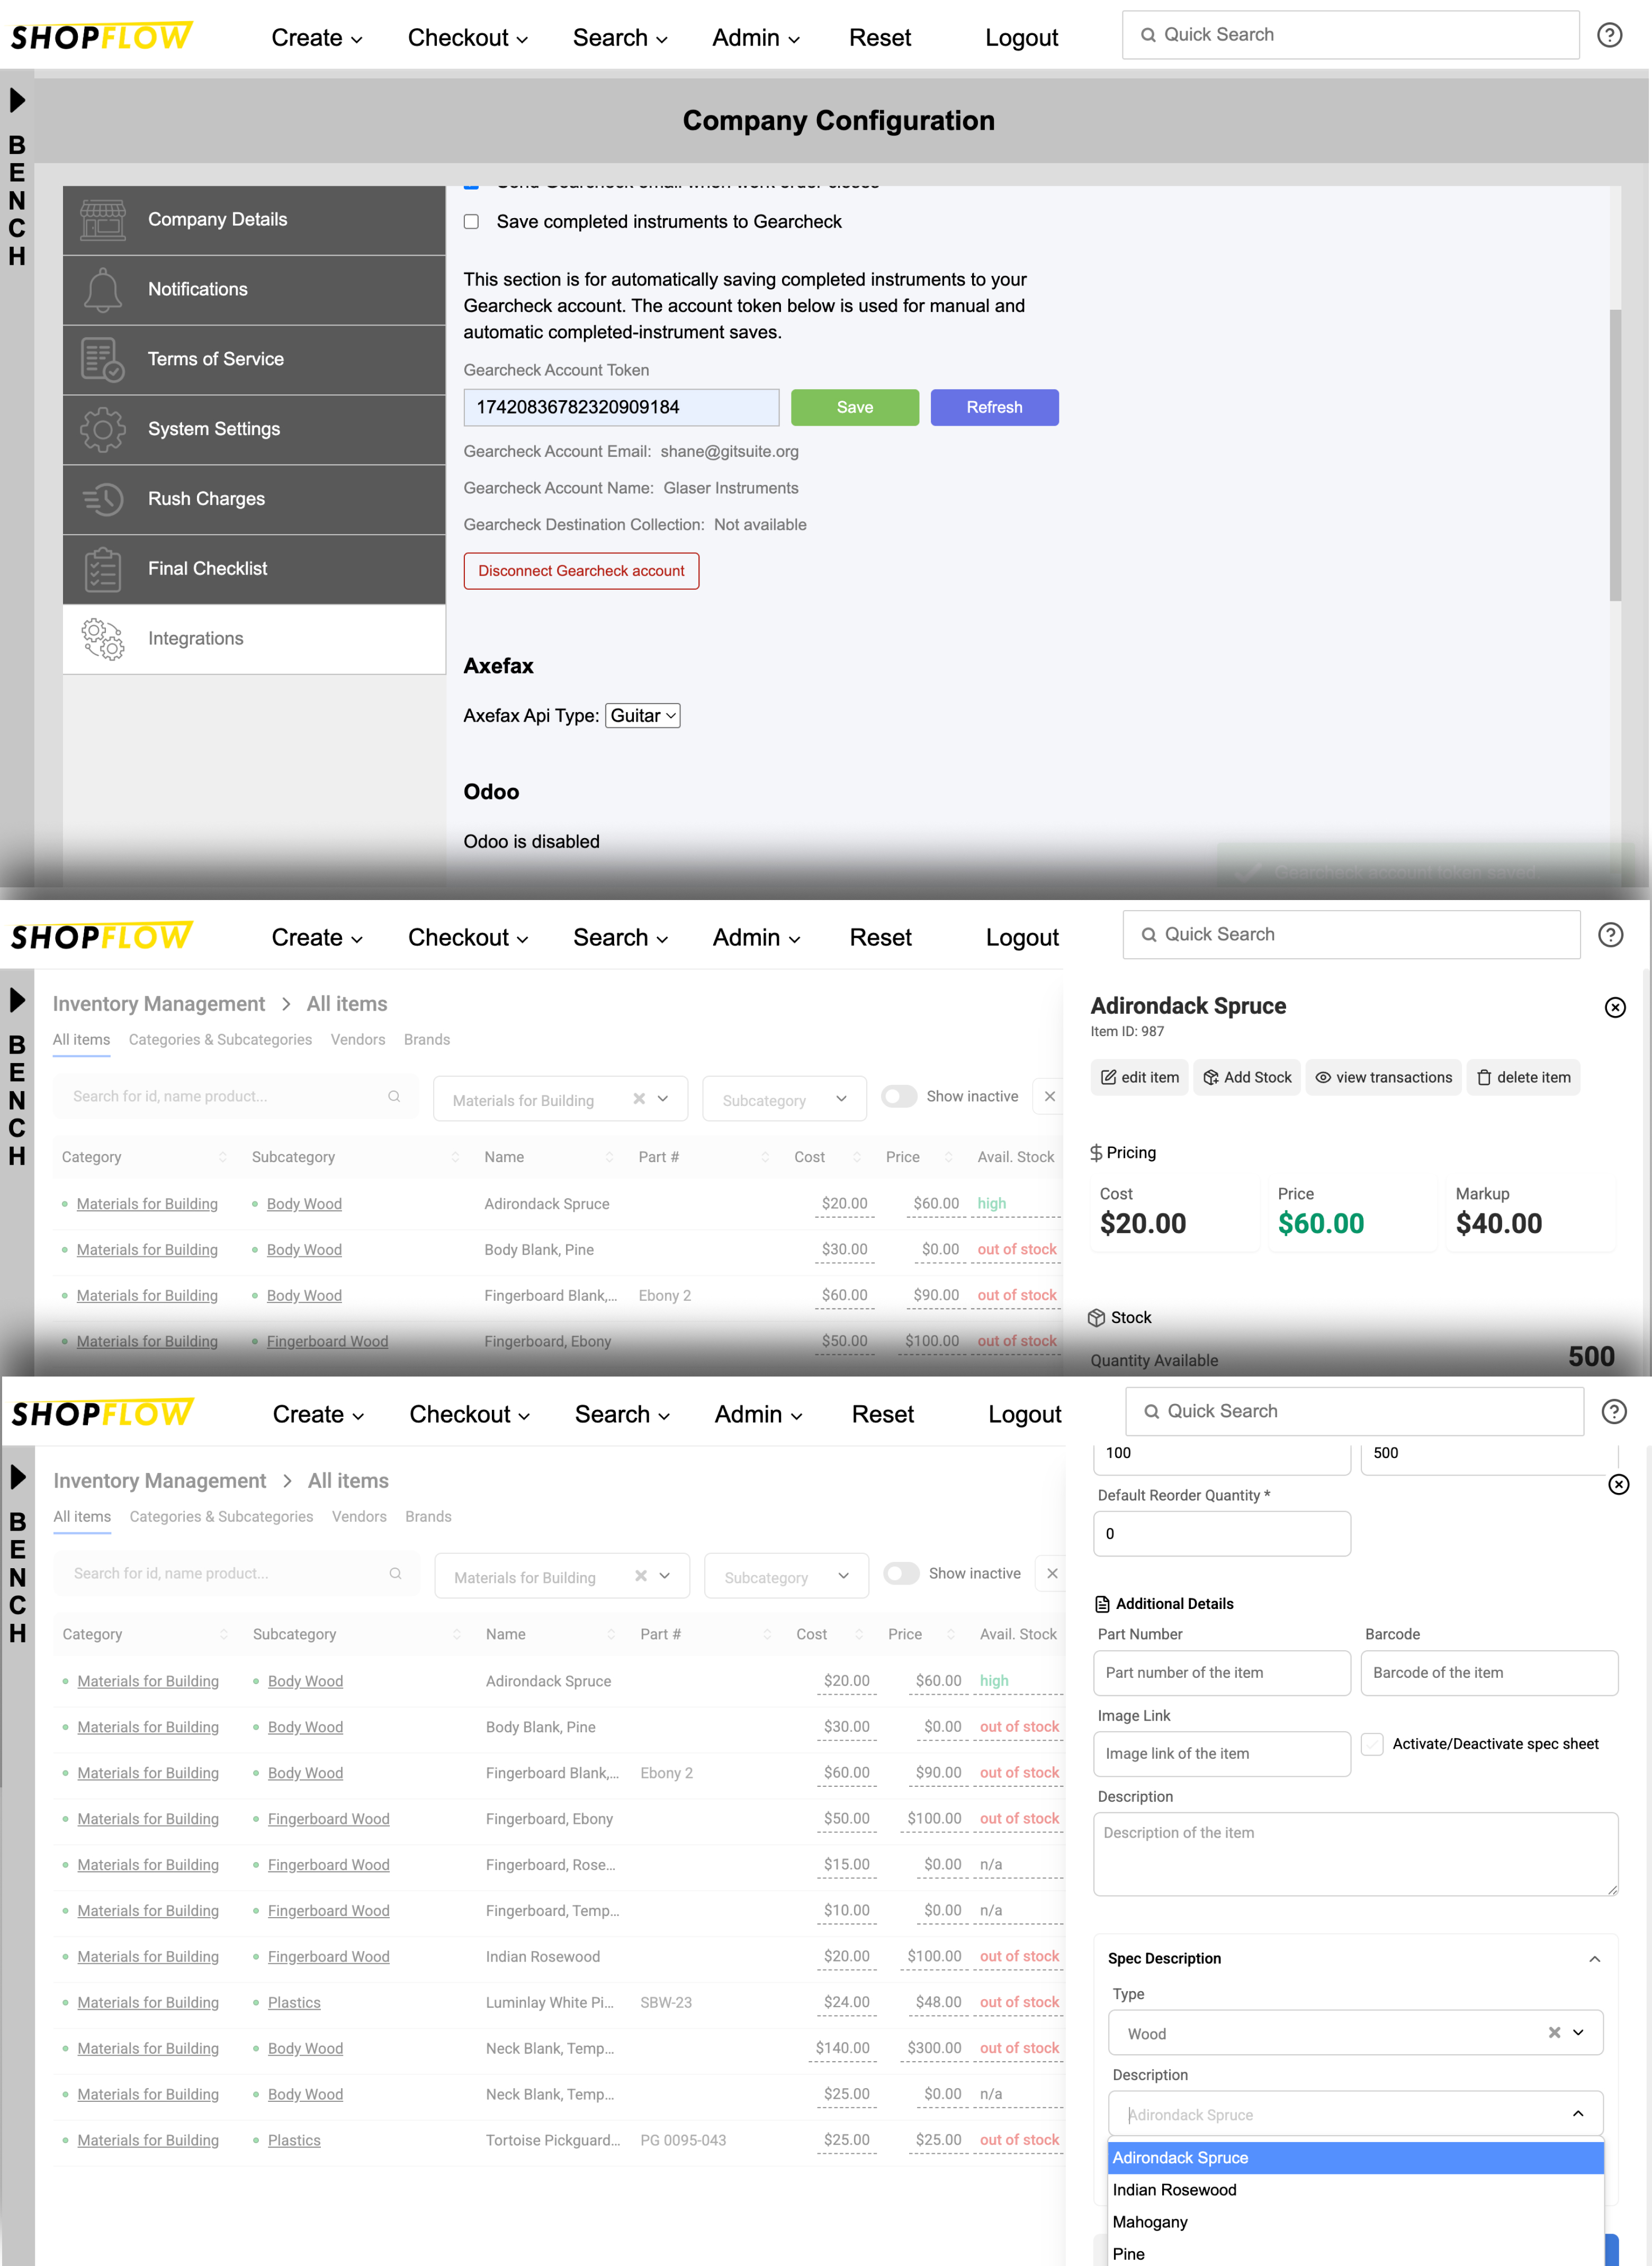
1. In Shopflow, navigate to Admin>Company>Integrations
2. Scroll to find the Gearcheck section
3. Paste token into “Gearcheck Account Token” field using CTRL OR CMD+V. Click Save.
4. Ensure the box 'Save completed instruments to Gearcheck' is checked.
Matching Shopflow Inventory Items
1. Navigate to Admin>Inventory.
2. Click 'Category' dropdown box and select 'Materials for building'.
3. Select a desired wood type from the list to open its item profile.
4. Click 'Edit Item' button from the top left.
6. Scroll to the bottom of the item editor to find 'Spec Description.'
7. Click 'Description' dropdown. Your previously entered wood-types from Gearcheck should appear here.
8. Match wood from Shopflow Inventory as it appears in Gearcheck,
9. Repeat steps 3-8 for all wood types.
Transferring Completed Build Attributes to Gearcheck
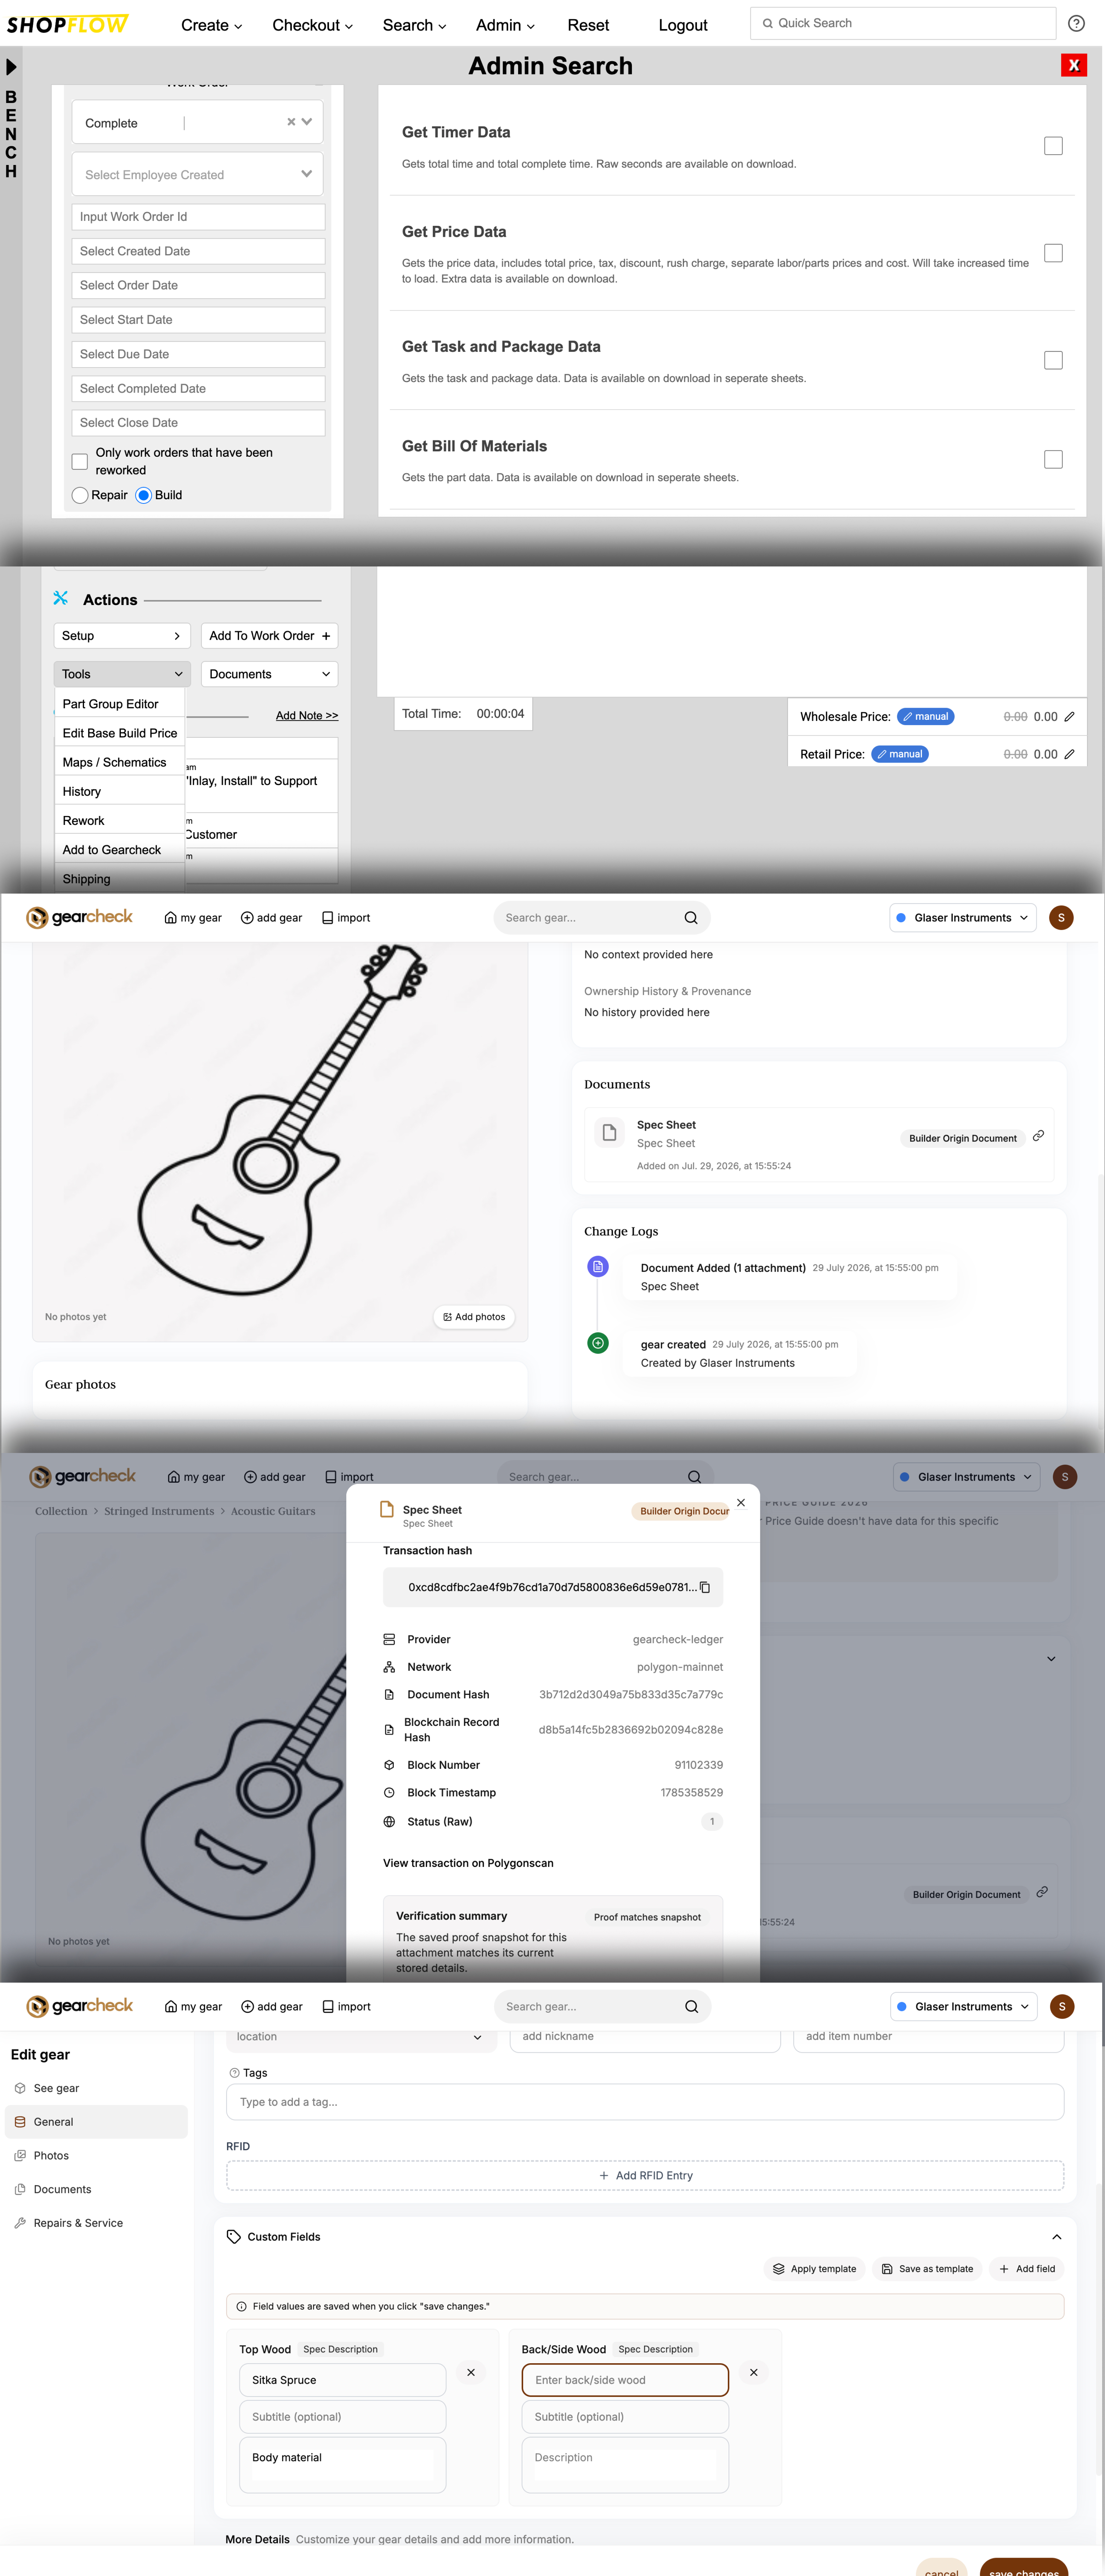
1. Navigate to Admin>Reports>Admin Search
2. Use search tool to filter for Completed builds
3. Click into a completed build
4. Under the 'Actions' tab in the left hand panel, tap 'Tools' dropdown menu
5. Scroll to find 'Add to Gearcheck' action
6. Navigate back to Gearcheck
7. Your Instrument should appear in your 'My Gear' profile now. You should see the serial number field populated, wood types populated in the Addition Information section, and Spec Sheet added to the Documents tab. Add photos of the instrument and any other details.
Your Spec Sheet will appear under the 'Documents' tab of your gear profile. Open the document by clicking the link icon next to it.
Editing Build Attributes within Gearcheck
1. To edit build attributes, click the desired instrument in Gearcheck
2. Click the edit gear icon
3. Scroll to find custom fields section. The template displaying 'Top Wood' and 'Back/Side wood' should appear here.
4. To add a field to your previously built template, click 'Add Field'
5. Name the field you want to add to the template
6. Click dropdown box called field type. Select from the drop down.
7. Click 'Save' on the instrument profile to save your changes.